Real Red Velvet Cake Recipe
If you are looking for a real red velvet cake recipe that is soft, moist, colorful, and easy to make at home, this recipe is for you.
This homemade red velvet cake has a beautiful red color, a light chocolate flavor, and a soft, moist texture that makes it perfect for birthdays, celebrations, holidays, afternoon desserts, or simply enjoying a slice with your favorite drink.
The first time i made i was shocked it came out very moist and delicious……at first i just wanted to try my luck, and guess what? it came out so moist, yummy and very delicious.
What I love about this particular recipe is how straightforward the preparation is. You do not need a complicated baking technique.
You simply prepare the dry ingredients, mix the wet ingredients, add your red food coloring, combine everything, adjust the batter with water, and bake.
The result is a beautiful homemade red velvet cake with a soft and moist texture.
Why You’ll Love This Real Red Velvet Cake Recipe
There are many reasons to save this easy red velvet cake recipe.
First, the ingredients are simple and easy to work with. You don’t need a long list of specialty ingredients to make this cake.
Second, the preparation is beginner-friendly. If you are new to baking cakes, the process is easy to follow because the dry and wet ingredients are prepared separately before being combined.
my first time making it and it came out so good…………trust me if you follow the instruction here, then yours will.
The amount of red food coloring can be adjusted according to the strength of the food coloring you have. Some food colors are much more concentrated than others, so you may need less or more to achieve the shade of red you want.
The cake is also versatile. You can serve it plain, or decorate it with cream cheese frosting or another frosting of your choice.
And if you are baking for a birthday, Valentine’s Day, Christmas, a family gathering, or another celebration, the bright red color makes this cake especially attractive.

What Is Red Velvet Cake?
Red velvet cake is a tender cake with a mild cocoa flavor and a distinctive red color.
Although many people associate red velvet cake with a particular traditional recipe, there are actually many variations. Common red velvet recipes often include cocoa, red food coloring, and an acidic ingredient such as buttermilk or vinegar. These ingredients can contribute to the characteristic flavor, color, and texture associated with red velvet cake.
The history of red velvet cake is also interesting. The cake became especially popular in the United States during the 20th century, and its exact origin is debated. The Smithsonian notes that credible references to red velvet appeared in the 20th century and that early versions relied partly on reactions involving cocoa and acidic ingredients to enhance the reddish appearance.
Today, red food coloring is commonly used to create the vivid red color people expect from red velvet cake.
This recipe takes a simple homemade approach while focusing on the soft, moist cake texture that makes red velvet so enjoyable
Ingredients for Real Red Velvet Cake

Here are the ingredients you need for this recipe:
- 2 cups all-purpose flour
- ¼ cup cocoa butter, as used in this recipe
- ⅓ cup sugar
- ½ tablespoon baking soda
- ½ tablespoon baking powder
- A pinch of salt
- ¼ cup vegetable oil
- ¼ cup melted butter
- 1 large egg
- Vanilla essence
- ¼ tablespoon red food coloring, or according to the strength of your food coloring
- 1½ cups water
About the Red Food Coloring
The amount of food coloring you need can vary.
For this recipe, I used about ¼ tablespoon of red food coloring because the food coloring I had was very active and concentrated.
You should not feel that you have to use exactly the same amount.
If your food coloring is less concentrated, you may need more. Add it gradually and check the color of the batter until you reach the shade you want.
If you want a deeper red cake, you can add a little more food coloring. However, adding too much can affect the appearance and potentially the flavor, so it is better to add it gradually.
Butter and Oil: Can You Use Only Oil?
Yes.
For this recipe, I used ¼ cup vegetable oil and ¼ cup melted butter.
The melted butter is optional. If you prefer to use only vegetable oil, you can use ½ cup vegetable oil instead.
Using both butter and oil gives you a combination of buttery flavor and moisture. Using only oil is also a convenient option when you want to simplify the recipe.
Many red velvet cake recipes use oil, butter, or a combination of both, depending on the desired texture and flavor.
How to Make Real Red Velvet Cake
Now let’s get into the step-by-step method.
I have seven process photos for this recipe, and I recommend placing each picture directly after the step it shows. This makes the recipe much easier for readers to follow.
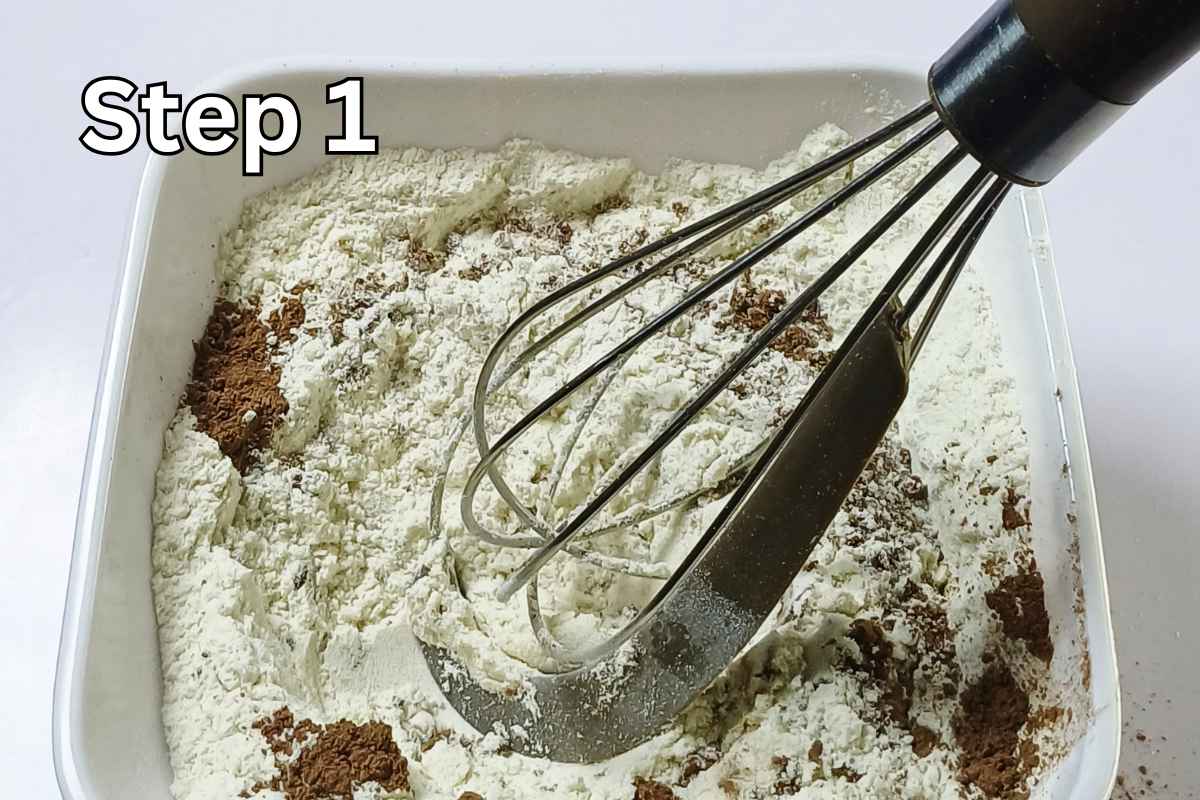
Step 1: Mix the Dry Ingredients
Start by preparing the dry ingredients.
In a clean mixing bowl, add your 2cups of flour, cocoa butter, sugar, baking soda, baking powder, and a pinch of salt.
Mix the dry ingredients thoroughly so everything is evenly distributed.
It is important to combine the dry ingredients properly before adding them to the wet mixture. This helps distribute the baking soda, baking powder, salt, and cocoa mixture throughout the flour.
Take your time with this step and make sure there are no large lumps.
Step 2: Mix the Wet Ingredients
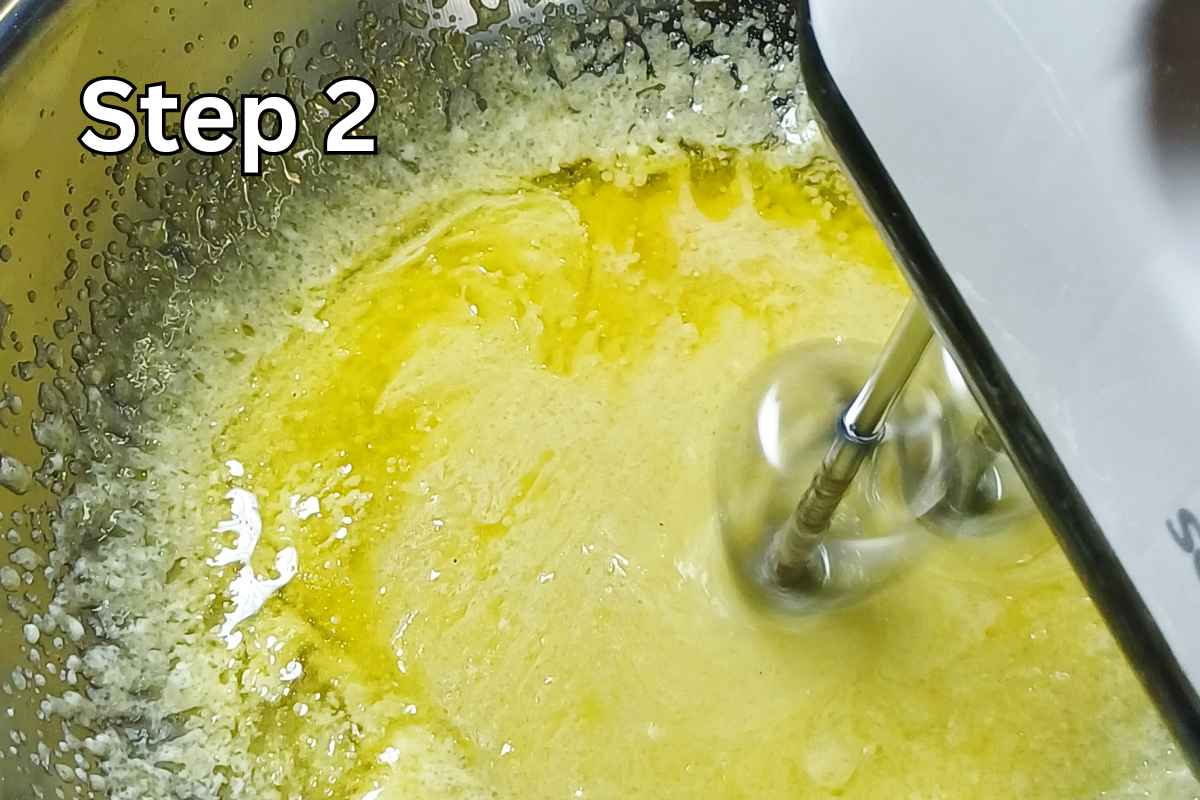
In a separate bowl, add your ¼ cup vegetable oil and ¼ cup melted butter.
If you are using only vegetable oil, remember that you can replace the butter and oil combination with ½ cup vegetable oil.
Add one egg and your vanilla essence.
Using a mixer, mix the wet ingredients thoroughly until they are well combined.
Mixing the wet ingredients properly helps create an even base for the cake batter.
Step 3: Add the Red Food Coloring
Next, add your red food coloring.
For my recipe, I used approximately ¼ tablespoon because my food coloring was very active.
However, the amount you need may be different.
Start with a small amount and mix it in. Look at the color of the batter and add a little more if necessary.
If you want a darker red color, gradually increase the amount until you reach the shade you prefer.

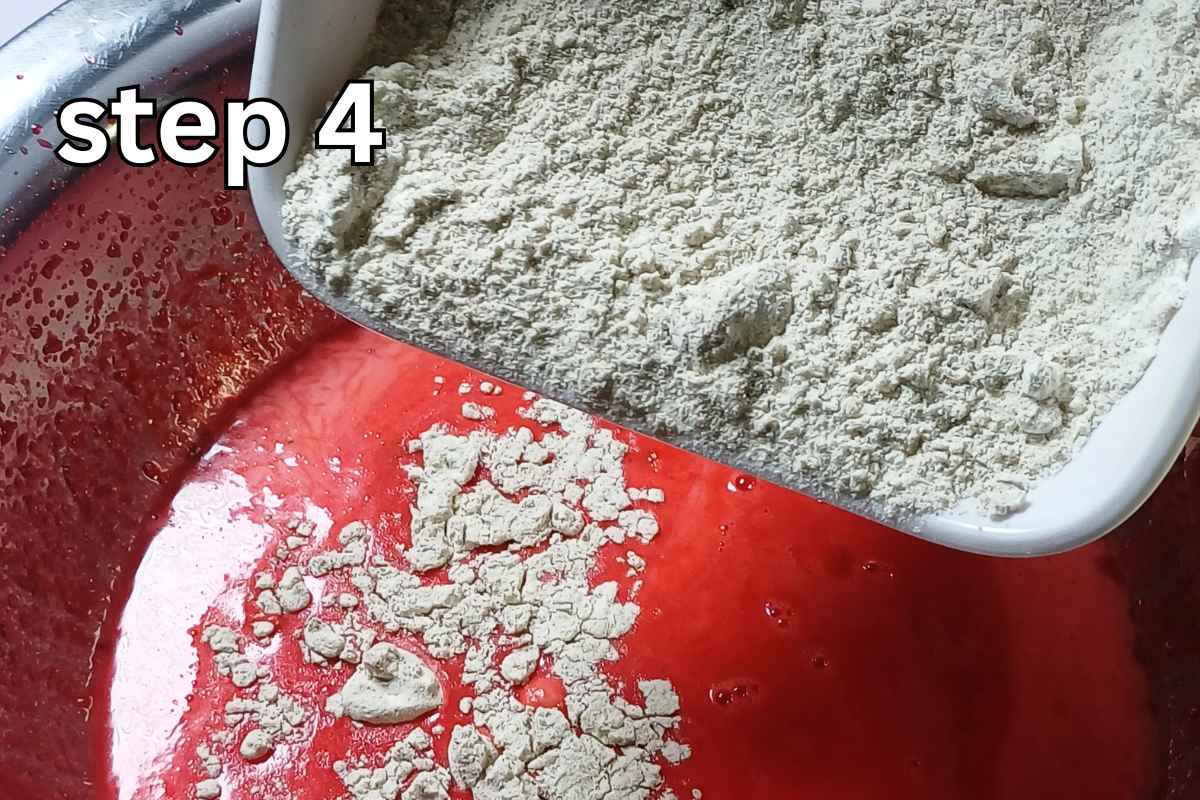
Step 4: Add the Dry Ingredients to the Wet Ingredients
Once the wet mixture has been prepared and colored, it is time to add the dry ingredients.
Gradually add the dry ingredient mixture to the wet ingredients.
Do not rush this step.
Adding the dry mixture gradually makes it easier to combine everything without creating a large number of lumps.
Step 5: Mix the Batter
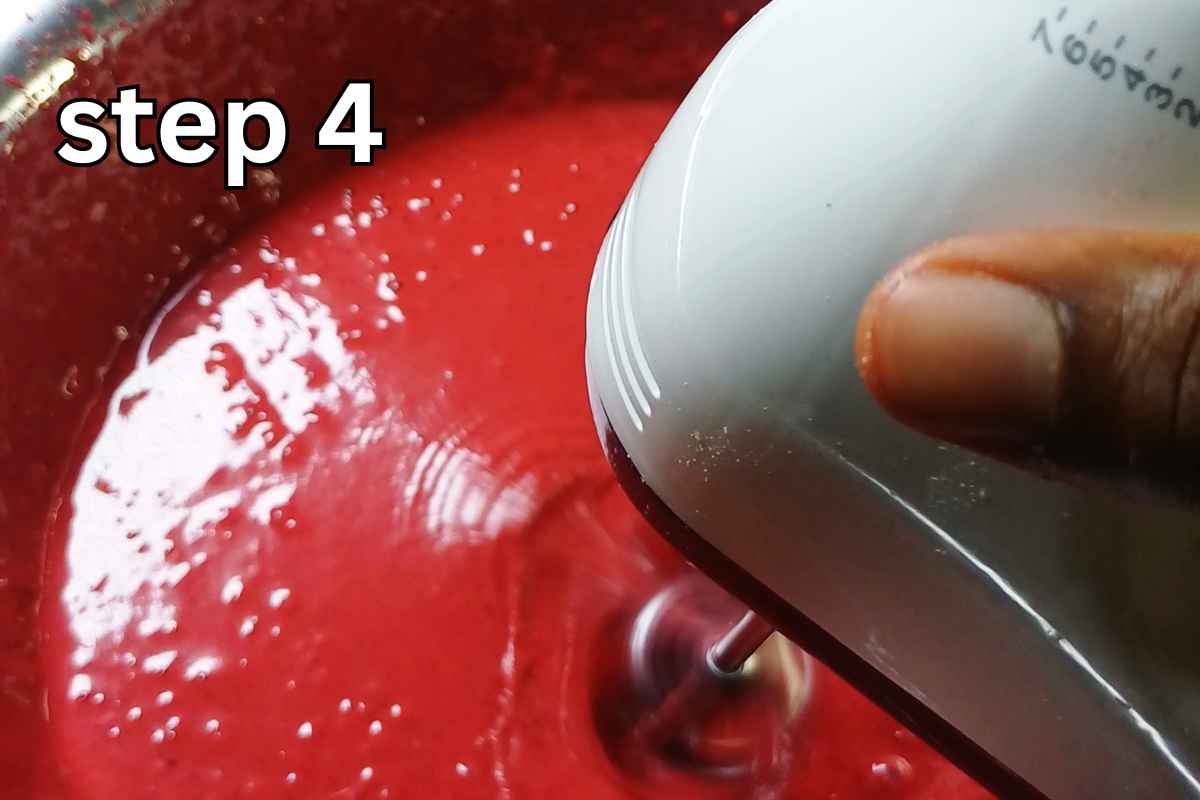
Now mix the dry and wet ingredients together using your mixer.
Mix thoroughly until the ingredients are combined and you have a smooth cake batter.
After combining the ingredients, gradually add your 1½ cups of water.
Continue mixing until everything is properly incorporated.
The final batter should not be too watery and should not be too thick.
You are looking for a consistency similar to pancake batter.
This consistency is important because it helps you achieve the soft, moist cake texture you are looking for.
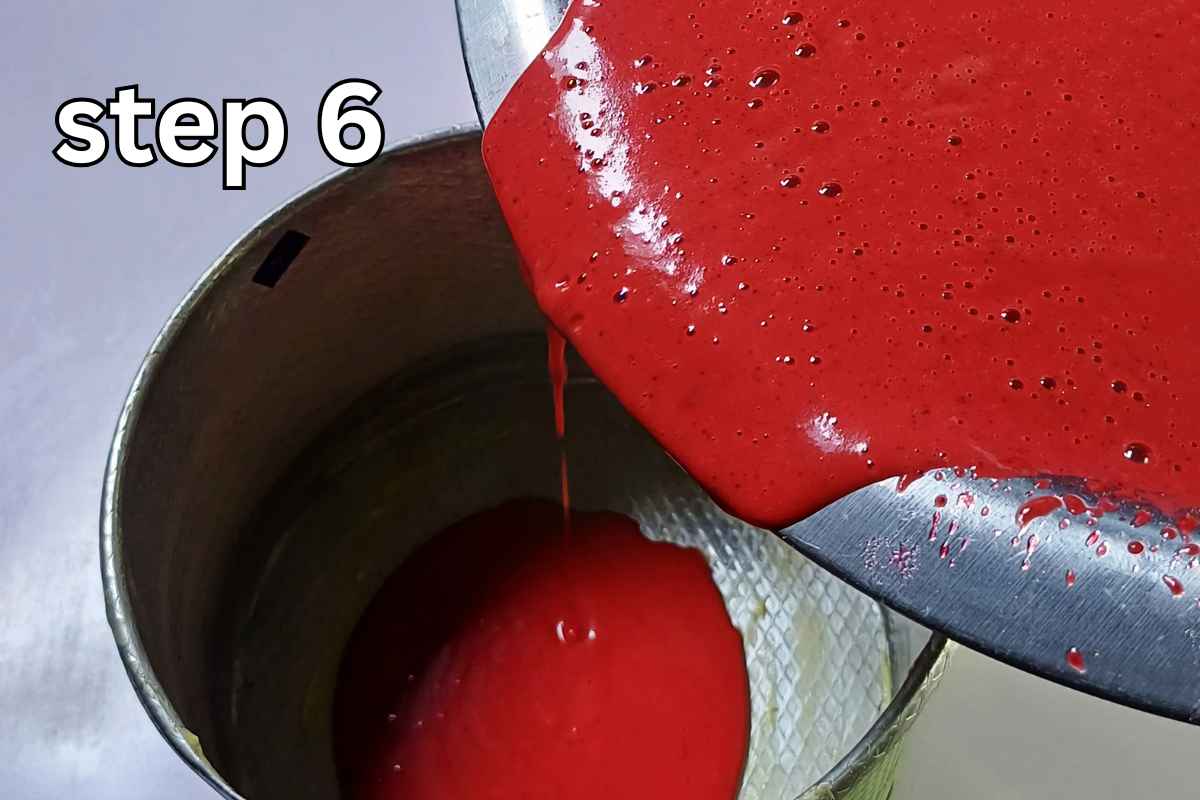
Step 6: Pour the Batter Into the Pan
Prepare your baking pan before adding the batter.
You can grease the pan appropriately so the cake is easier to remove after baking.
Pour the finished red velvet cake batter into the pan.
Try to distribute the batter evenly so the cake bakes consistently.
Step 7: Bake the Red Velvet Cake
Place the cake pan in your preheated oven.
For this recipe, I baked the cake for approximately 30 minutes on low heat.
However, baking time can vary depending on the oven you are using, the size and type of pan, and how your oven distributes heat.
That means you should not rely only on the 30-minute mark.
Start checking the cake toward the end of the baking time.
One common way to check whether a cake is done is to insert a toothpick or cake tester into the center. If it comes out clean or with only a few moist crumbs, the cake is generally ready. Professional baking recipes also recommend using this type of doneness check rather than relying only on time.
Be careful not to overbake the cake because excessive baking can make a cake dry.
Once the cake is baked, remove it from the oven and allow it to cool.

How to Tell When Red Velvet Cake Is Done
The baking time for this recipe is approximately 30 minutes, but every oven is different.
Rather than opening the oven repeatedly, begin checking the cake toward the end of the expected baking time.
Insert a toothpick into the center of the cake.
If the toothpick comes out clean or with a few moist crumbs, the cake should be done.
If you see wet batter on the toothpick, give the cake more time and check again.
Tips for Making a Soft and Moist Red Velvet Cake
Don’t Add Too Much Cocoa
One important thing about red velvet cake is that it is not supposed to taste exactly like a regular chocolate cake.
The cocoa should complement the other flavors rather than completely overpower them.
For this reason, avoid adding extra cocoa without adjusting the rest of the recipe.
Don’t Overdo the Food Coloring
The food coloring you use may be stronger or weaker than someone else’s.
My food coloring was very active, so I only needed approximately ¼ tablespoon.
If yours is less concentrated, you may need more.
Add it gradually until you reach your preferred red color.
Get the Batter Consistency Right
This is one of the most important parts of the recipe.
After adding the water, your batter should not be extremely thin.
It should also not be so thick that it is difficult to pour.
The consistency should be similar to pancake batter.
Getting the consistency right helps you achieve the soft and moist texture you want.
Don’t Overbake
Even a good cake recipe can become dry if it stays in the oven for too long.
This recipe takes approximately 30 minutes at low heat, but begin checking the cake as it approaches that point.
Once a toothpick inserted into the center comes out clean or with a few moist crumbs, remove the cake from the oven.
Why Is My Red Velvet Cake Not Red Enough?
If your cake does not look as red as you expected, the first thing to consider is your food coloring.
Different food colorings have different strengths.
Some are highly concentrated, while others require a larger amount to achieve a strong color.
You can add your food coloring gradually before baking until the batter reaches the color you want.
Also remember that cocoa contributes a darker tone to the batter, so the final shade may not look exactly the same as the color of the raw batter.
Can I Make This Cake Without Red Food Coloring?
Yes, you can make the cake without red food coloring, but it will not have the bright red appearance normally associated with red velvet cake.
Food coloring is commonly used in modern red velvet recipes to create the signature red appearance.
Without it, you will still have a cocoa-flavored cake, but the color will be much less dramatic.
If the appearance of the cake is important to you, using red food coloring is the easiest way to achieve the traditional visual effect.
What Frosting Goes With Red Velvet Cake?
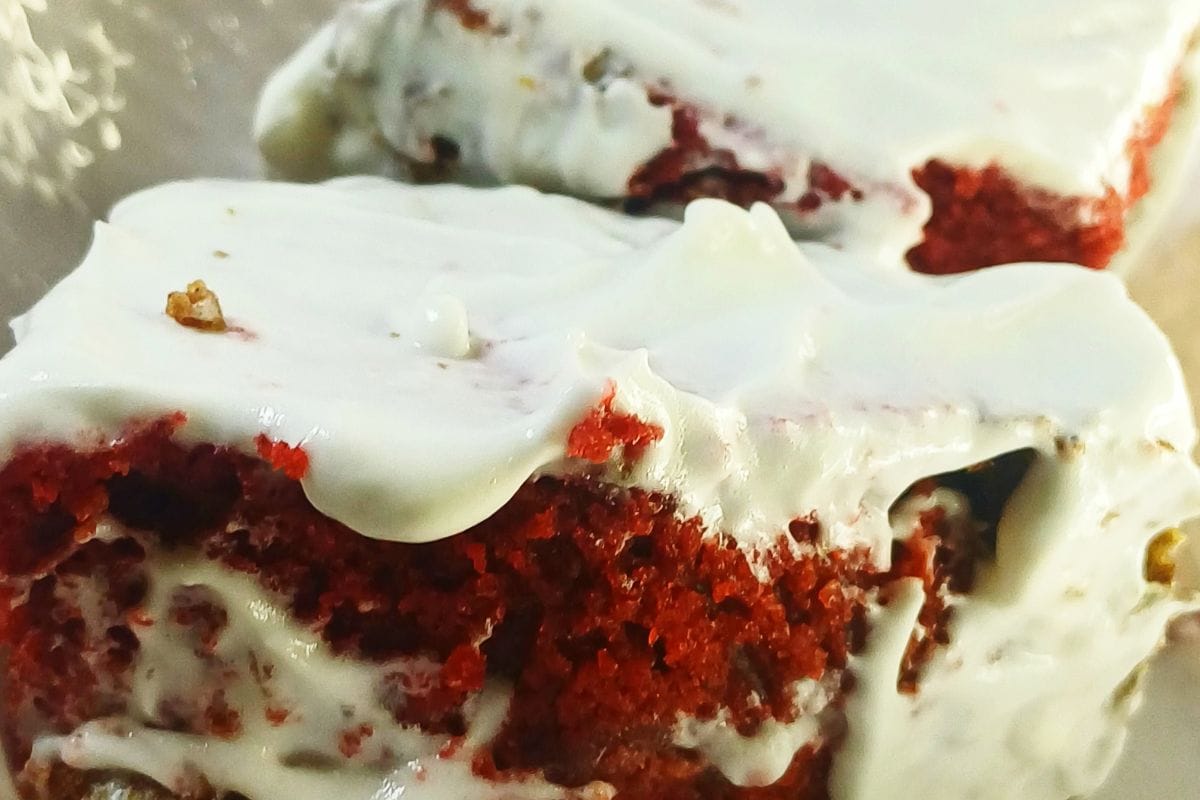
Red velvet cake is commonly paired with cream cheese frosting because the slightly tangy frosting complements the sweet cocoa-flavored cake.
You can also use buttercream frosting if you prefer.
Cream cheese frosting is especially popular with red velvet cake, although historically there have been different styles of frosting associated with the cake.
If you want a simple cake, you can also serve this recipe without frosting.
How to Serve Red Velvet Cake
You can serve this homemade red velvet cake in several ways.
For a simple presentation, cut the cake into slices and serve it with tea, coffee, milk, or your favorite drink.
For birthdays and celebrations, you can decorate it with frosting and additional cake decorations.
You can also add fresh berries or other toppings if you want to make the presentation more festive.
For an everyday dessert, however, a simple slice of soft red velvet cake is enough.
How to Store Red Velvet Cake
Allow the cake to cool completely before storing it.
If the cake is unfrosted, keep it in an airtight container at room temperature for short-term storage, provided your environment is suitable for room-temperature cake storage.
If you cover the cake with cream cheese frosting, refrigeration is generally the safer choice because cream cheese frosting is perishable.
When refrigerated, allow the cake to sit out for a short time before serving if you prefer a softer texture.
Keep the cake properly covered so it does not absorb odors from other foods in the refrigerator.
Can I Make This Recipe Ahead of Time?
Yes.
You can bake the cake ahead of time and allow it to cool completely before storing it properly.
This can be helpful when you are preparing for a birthday, family gathering, holiday, or other celebration.
If you plan to frost the cake later, make sure the cake is completely cool before adding the frosting.
Trying to frost a warm cake can cause the frosting to soften or slide.
Why This Is a Great Homemade Cake Recipe
One of the best things about this recipe is its simplicity.
You don’t need an overly complicated process.
Final Thoughts
This Real Red Velvet Cake Recipe is a simple homemade cake recipe for anyone who wants a soft, moist cake with a beautiful red color and a mild cocoa flavor.
The key to this recipe is paying attention to the batter consistency. After adding the water, you want a batter that is similar to pancake batter—not extremely watery and not too thick.
The amount of red food coloring can also be adjusted according to the strength of your particular food coloring. Since mine was very active, approximately ¼ tablespoon was enough for the color I wanted.
For the fat, I used a combination of ¼ cup vegetable oil and ¼ cup melted butter, but you can simplify the recipe by using ½ cup vegetable oil instead.
Bake the cake for approximately 30 minutes on low heat, remembering that ovens vary. Check the center with a toothpick near the end of the baking time to make sure the cake is properly baked.
Whether you’re making this red velvet cake for a birthday, holiday, family gathering, Valentine’s Day, or just because you want something delicious and homemade, this recipe is one worth saving.
let it cool, add your favorite frosting if you like, slice it, and enjoy a soft and delicious homemade red velvet cake.
If you enjoyed this recipe, trust me you will love this Easy chocolate chip cookies
Instructions
- Mix the flour, cocoa butter, sugar, baking soda, baking powder, and salt in a bowl.
- In a separate bowl, mix the vegetable oil, melted butter, egg, and vanilla essence thoroughly with a mixer.
- Add the red food coloring and mix until the desired color is reached.
- Add the dry ingredients to the wet ingredients.
- Mix thoroughly with a mixer, then add the water gradually until the batter reaches a pancake-batter-like consistency.
- Pour the batter into a prepared baking pan.
- Bake for approximately 30 minutes on low heat, checking the center with a toothpick to determine when it is done.
- Remove from the oven, allow to cool, and serve with your favorite frosting or toppings.